Open topic with navigation
The instructions below describe how to use the appraisal district processing
'wizard'.
All tax offices can use the wizard; the office does not need to be affected
by HB1010 multi-appraisal district processing.
Before using the wizard, be sure that the control screen (County CAD
Processing) has been filled out for the appraisal district software vendor
whose file you will be processing. Additionally, make sure that the user
has the appropriate roles, user entitlements, etc. See HB1010
Wizard Setup Procedures for more information. This help topic includes
a table of batch menu numbers used for both prior and current year processing.
 User Entitlements
The following user entitlements must be set for each user who
needs access to the Batch Menu and Batch Request screens. They are part
of the Run Batch Processes task.
See Tasks, Entitlements, and
Jobs for more information. The user entitlement for each batch menu
no. mentioned below must be set to Y
for each authorized user. Batch menu nos. default to N
when they are added.
BATCH_MENU
- access to the Batch Menu to generate the reports.
BATCH_REQUEST
- access to the Batch Request screen to see the reports.
The table below describes the steps, both mandatory and optional, that
every tax office should use when processing appraisal district files.
Following that, detailed information about each step is given.
| Wizard
Stage No. | a
Activity | ACT
Screen or Batch Menu No. |
|
|
Use
the File Upload button
on the Batch Menu screen to load the appraisal district files
to the proper place on the ACT 7 server.
Dallas County tax office only: Files should be on the secure FTP server in this directory: FTP_Dallas_County_ACT\Appraisal_District\[county name]
|
Batch Menu, main screen
|
| 1 - To
Staging Tables
|
Load
the file(s) into the staging table. For name changes, the data
is also loaded into the CAD Owner table (except for Harris County
files, for which steps 2, 3, and 4 must be run to load the data
into the CAD tables)
Note: For 2015 SB1 legislative changes, if your tax office is given two files, one with $25,000 HOM exemptions and another with $15,000 HOM exemptions, you must load both. |
Batch
menu number varies according to the appraisal district vendor
used by the tax office. See CAD
Wizard Setup Procedures for appropriate numbers.
|
|
|
a.
Click View Reports to
see the Batch Request screen for this process.
b. To see the staging table screens, return to Main
Menu, select Inquiry,
then choose Load Inquiry [vendor]
File
Review the data.
|
|
| 2 - To
CAD Relationship CAD (non-Name Change files, except for Harris
County)
|
Populates
the CAD Relationship CAD table (non-HB1010 tax offices must do
this stage)
|
BMI
14002
|
|
|
Click View Reports to
see the Batch Request screen for this process.
b. Click a CAD Sequence
number to see the CAD Relationship CAD screen.
c. Review ACT CAN numbers and make any necessary corrections.
|
|
| 3 - From
CAD Relationship CAD (non-Name Change files, except for Harris
County)
|
Copies
the ACT CAN number in the CAD Relationship CAD screen to the staging
tables (Load Inquiry screens). The ACT CAN is the account
number used in ACT 7.
|
BMI
14003
|
|
|
Click
View Reports to see the
Batch Request screen for this process.
|
|
| 4 - To
CAD Tables (for Name Change files, do this only for Harris County
files)
|
Moves
the data in the staging tables to the CAD tables. Frozen levies
and receivables are not
created.
|
BMI
14004 (BMI 14783 or 14784 for HCAD files)
|
|
|
a.
Click View Reports to
see the Batch Request screen for this process.
b. CAD Inquiry screen.
Review the data in the CAD tables.
|
b. Load Inquiry screens for software vendor
|
| 5 - To
CAD Ceilings (non-Name Change files)
|
Checks
the Jurisdiction CAD Relation table to see which, if any, units
should have the frozen levies calculated by ACT. The frozen levy
is calculated at this point.
|
BMI
14005
|
|
|
Click
View Reports to see the
Batch Request screen for this process
|
|
| 6 - To
Receivables (non-Name Change files)
|
Creates
receivables for the accounts in that Control ID.
|
BMI
14006
|
|
|
Click
View Reports to see the
Batch Request screen for this process.
|
|
| 7 - Audit
(non-Name Change files)
|
Generates
the 501C for the tax office to review.
|
BMI
14007
|
| 7.1
|
a.
Compare appraisal district totals to those on the CAD Tables Jurisdiction
Summary Report & File (TC501C) report
|
|
| 7.2
|
(optional
but recommended) Print and review the Frozen Accounts Analysis
Report.
|
BMI
1915
|
| 7.3
|
(optional
but recommended) Print and review the Freeze Reports - New, Deleted,
Updated, Name Changes
|
BMI
1919
|
| 7.4
|
(optional)
Print and review the Supplement/Correction Pre-Process report
|
BMI
752
|
| 7.5
|
(optional)
Print and review the Appraisal Edit report
|
BMI
753
|
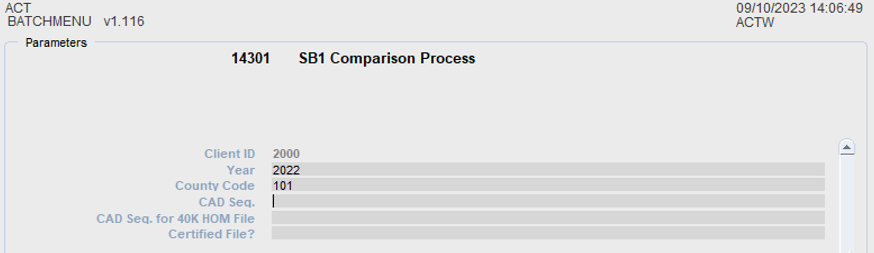
| 7.5 - Compare
|
(SB2 2023) Populate Event Comparison CAD screen with freeze compression data for school districts.
(SB1 2015) Populate Event Comparison CAD screen with data based on $15,000 and $25,000 HOM exemptions on school district accounts. If only one file is provided, with $25,000 exemption, the $15,000 will be calculated by the system.
|
BMI 14301 |
| 8 - To
Production
|
Apply
the data in the CAD Tables to the production tables for the accounts
in that Control ID
|
BMI
14008
|
| 8.1
|
(optional)
Run the Supplement/Correction Detail Report (TC105) line
|
BMI
702
|
| 8.2
|
Run
the Certified Roll Jurisdiction Summary Report & File (TC501)
and balance these totals from production to those from BMI 1610
(optional for current year supplement/corrections, run the Current
Year Jurisdiction Summary Report & File (TC502 - TC225) process. |
BMI
1611 (enter mode 5)
BMI 1618
|
| 8.3
|
Run
the TC168 to balance the beginning and ending totals
|
BMI
5
|
| 8.4
|
Verify that the
rendition flags are set properly in the Property Value Detail
screen (Account Master) for the rendition penalty accounts.
|
Account
Master, Property Value Detail screen
|
| 8.5
|
(if
printing in house statements) Run the Populate Trigger Table for
Supplement Statements process to populate the trigger table with
accounts that owe money as a result of the supplement or correction
file being processed.
|
BMI
717
|
| 8.6
|
(in
house statements) Print batch current statements for these accounts
and insert a note
|
batch
menu no. varies by tax office
|
| 8.7
|
(if
sending a statement file to printers) Run the Load Statement Accounts
Table from Statement Trigger Table process
|
BMI
1058
|
| 8.8
|
(optional)
Delete accounts paid by agents from Statement Accounts table
|
SQL
script
|
| 8.9
|
(if
sending a statement file to printers) Run the Create Data File
for Current Statements process
|
BMI
1079
|
| 8.10
|
(if
sending a statement file to printers) FTP the file to the FTP
server
|
BMI
1602
|
| 8.11
|
Run
the Add Notes for Accounts in Statement Data File process to add
a note to the accounts that received statements
|
BMI
1043
|
Load the files to the proper place on the
ACT 7 server, File Upload button
Note: This step is not needed for Dallas County's True Automation or Tarrant County files. For these, the files must be on the secure FTP server in the directory [FTP_DALLAS_COUNTY_ACT\Appraisal District\[county].
- From
the of ACT 7, click on Products,
then Batch Products. The
ACT Batch Menu will appear.
- Upload the file to the ACT 7 server. This copies the file, it does not remove the file from your system.
1.Stage 1 - Load the data from the file to the staging
tables
- From
the , click on Update,
then CAD Load/Update. The
CAD Files - Load and Update screen appears. This is the first
screen of the wizard.
- The
most recent ACT Control ID
and its associated processes are shown. The screen will be blank only
if the wizard has not been used before. The batch menu numbers to
load the staging tables for each of the counties having an entry in
the County CAD Process screen are given:
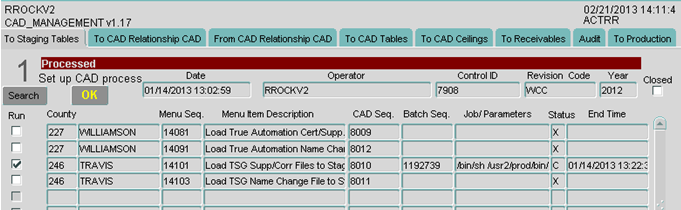
Control ID:
an auto-generated number that acts as a global ID for a specific 'run
through the wizard'.
CAD Sequence:
an auto-generated number linked to a specific vendor for a specific ACT
Control ID.
For example: Control ID 7908 above is used to identify
the steps to be used to load and process both
Williamson and Travis County files. CAD Sequence 8012 is associated with the steps to be used to process Williamson County name change
files for this (and only this) Control ID.
- There are two ways to search for data,
- Press F7.
- Enter a Year, Date, Control ID, Operator ID, and/or Revision Code.
- Press F8.
or
- Click Search. The CAD Search screen appears:
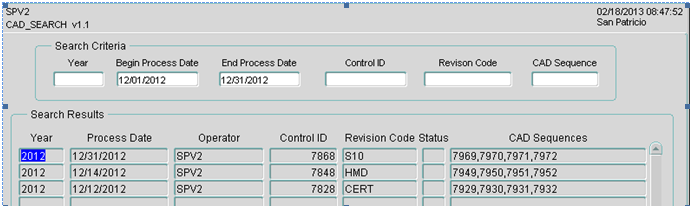
- Enter search criteria in any of the fields at
the top (Year, Begin and End Process Dates, Control ID, Revision Code, CAD Sequence).
- Enter data into any or all of
the fields at the top.
- Press F8. Asterisks surrounding a CAD Sequence number indicates that that sequence has been completed.
- To see the CAD Wizard runs for a specific Control ID, double-click the control ID to return to the main screen.
- To begin a new search, press F7 and repeat the steps above.
- Assume you want to start processing
a new set of files:
- Click OK
- Enter a Revision
Code. This will be put in the Receivable screen after the data
is moved to the production tables.
- Change the Year
if necessary to match the year of
the data.
- Click OK.
A popup giving you the new ACT Control
ID appears.
- Click OK
to the message. The screen fills with the batch menu numbers and CAD
Sequences needed to load files for each of the appraisal district
vendors that send files to this tax office.
- To load files for one of the
vendors and counties, click the OK
to Run box for the Load process for that county.
- The batch
menu parameter screen for the selected Menu Item Sequence appears.
Depending on the county's appraisal district software vendor, the
parameters may vary, but most of the information will be auto-populated
and cannot be changed.
- Enter the name of the file(s)
in the appropriate fields. These are case sensitive; include the extension.
- Enter your Operator
ID.
- Other fields include County
Code (3-digit code), CAD Seq.
No. (from the Stage 1 screen above), Client
ID, and Tax Year.
- (True Automation, optional)
A Totals File Name should be entered to provide a comparison with
the TC501C report after stage 7 is completed.
If a mobile home file name is entered, the latest file format will be used.
- (True Automation name change file) If the preference TA_NMCH_LOAD_TAX_AGENT_RECORDS is set to Y, agent information is loaded along with owner name changes. Reports of new and deleted fiduciary request records are provided.
- (Software Group only) In the
Software Format field, enter
O if your files are in the
Orion format or A if they
are in the ACAD format. Appraisal district totals are provided on
these files.
- (SouthWest Data only) For certified
files, enter the Agent File Name
and Mortgage File Name. For
other files, leave these fields blank.
- (Harris County Tax Office only)
Enter a Client Roll No., Client
Roll No., Non-HCAD Files Directory (if necessary), Roll Type, and Load Date (this will be the last certified date after processing to production). In the Run
BMI 783, Load CAD Tables field, ACT recommends leaving this set to N.
- (Harris County Appraisal District files only) In the SB2 File field, enter Y if you are loading a file with $100,000 exemptions for 2023 or later. Enter N otherwise.
- (Harris County Tax Office only, Harris County Appraisal District files only) In the CAD Seq. for 100K HOM File field, enter the CAD Seq. No. of $100,000 homestead exemption file in order to load these HOM exemptions in a new request sequence. Other tax offices should leave this field blank.
- (Pritchard & Abbot) In the File Type field, enter C for certified or S for supplement.
- (Dallas County) In the Appraisal Mobile Home Info File Name, enter the mobile home file name (if a file was received), preceded by 'yyyy-mm-dd_nnnnnn_ '.
- Click Submit
Job, then click OK
on the "OK to Submit Job"
pop-up screen. You will be returned to the Stage 1 screen, where the
Batch Sequence number (the batch request seq. no.) and Job Name/Parameter
Values fields will be filled in.
- The Status
field contains a P (processing).
- To see if the load process
has finished, you can press F8
on the Stage 1 screen. Alternatively, you can click View
Reports to go to the Batch Request screen. The process is complete
when the Process End Time
is filled in and the Status
changes from P to C
(completed).
Note: The ACT_CAN
number is populated in the staging tables during this process. It
will be re-populated in Stage 3.
Name change files also load into the owner_cad table.
If a duplicate account number exists in the file, it will be put on a
log file. For Harris County files, this load does not occur; step 4 must
be run instead, to move the data from the staging tables to the CAD tables.
For the Harris County Tax Office, the Account No. field
in the staging tables will have the 7-digit personal property number,
not the converted 13-digit number. Also, bill suppress codes are not rolled
forward for Harris County Appraisal District files.
For True Automation file loads processed by Fort Bend County, the Appraisal District No. is set to `WC + appraisal district number', the Alias Key is set to the geo ID, and the Scanline No. is set to `WC + appraisal district number' and is left padded with zeros to make it 13 characters. If the client preference TA_CAN_LOCATION is set to PID, the account number is the Appraisal District No.
- To see the reports generated
with this process, click View Reports
on the Stage 1 screen. Duplicate accounts will be listed as errors
on the log file.
- For Dallas County, a Change Report provides before and after taxable values and the difference between the two amounts for each tax unit. Accounts that have had a change of jurisdictions are listed separately. Accounts that have no beginning (before) values are skipped. SIT-only units are listed twice, once with toal values and a second time for SIT only amounts. A Rollback Accounts report may also be generated.
- If you have files from another
vendor that are ready to load, you can repeat steps 5-8 for that vendor
on the Stage 1 screen. You do not
need to load files from all of the vendors before moving to the next
stage. You can return to the Stage 1 screen at a different
time to process a different set of files. You can also have files
in different stages of the wizard, except that the certified roll
for the home county must be processed first and it must be the first
file to move to the production tables.
- Review the staging table data
in the Load Inquiry screen.
- Return to the Main
Menu.
- Click on Inquire,
then select the Load Inquiry
item for the vendor whose files have been loaded. For example,
select to see the True Automation
staging tables. The fields displayed in the staging tables differ
from vendor to vendor depending on what data is provided in the files.
- You can search by Request
Seq. (the CAD Seq. No.), ACT
CAN, Geographic Account ID
(usually the long account number), or Prop
ID (usually the short appraisal district number).
Note:
On the Load Inquiry SWD File screen,
you can click either the Agents
or Mortgage buttons to see the
contents of those particular load files. Use the scroll bar on the right
side of the popup window to see each entry.
- If you have an '_UPDATE' entitlement for this vendor, you can click the View Arch Data button to see data from these same tables that have been archived. You cannot make changes to any archive data but you can make changes to any unarchived data (you may need to exit the screen and then return before updating). The Account In field tells you whether the data on the screen is in the archive or 'real' (unarchived) tables.
- If you do not have an '_UPDATE' entitlement for this vendor, you will be able to view all data, but 'real' and archived, but you cannot make changes to any of it. The View Arch Data button will not be visible.
- Review the information. It
must match the contents of the files. Make sure that if the files
are from the 'home' county, that there are no accounts from the overlapping
counties.
Note:
For tax units that are on a True Automation or Software Group file (ta_entities,
tsg_entities) but are not collected by a tax office, the tax unit field
in the Load Inquiry screens will be blank. These units will not be processed
further.
- SIT accounts are identified
on Software Group files by looking for a 'T' in the VIT_FLAG field. For
True Automation files, SIT accounts have an 'S' in the Improvement_sptb
field.
For accounts having units that
are less than 100% value, Software Group files include the apported values,
not the 100% values.
Software Group file loads will use the percentages provided for land, improvement, ag and timber values that are provided for each account, by unit. As additional stages in the wizard are run, the Apport_CAD, Receivable_CAD, Account Master Jurisdiction and Receivable screens will show the calculated values that considers these percentages. The ValDtl_CAD and Property Value screens will show the 100% values. If more than one ag value is given, the largest one will appear in the ValDtl_CAD and Property Value screens. State mandated, VTX and CAP exemption calculations also use these percentages.
For Montgomery County, timber values are provided for each unit.
Dallas County appraisal district files have additional fields, including pro-rated start and end dates, a CAP amount for each owner of a multi-owner account, and quarter pay indications for a multi-owner account.
- (optional) Using SQL, make sure
the number of accounts in the staging tables matches the number given
by the appraisal district.
- (optional, for Harris County
name change files) Using SQL, make sure the
were loaded. These do not display on the Load Inquiry screens.
- (optional, Harris County Appraisal District files only) Verify the roll numbers and record counts using the CAD Roll ID Administration screen.
Clean
Ups - At any time during the loading and processing of appraisal
district files, you can 'clean up' stages that you want to redo. See the
Clean Ups section at the end of this topic for instructions.
Closing
Control IDS - At any time during the processing, but most likely
after stage 8 has been completed, users can check the Closed button
on the Stage 1 screen. Once a Control ID is closed, no further processing
on those CAD sequences can occur. Only users having the OPEN_CAD_PROCESS
entitlement checked may re-open the Control ID for additional processing.
2. Stage
2 - Load the CAD Relationship
CAD table (non-Name Change files. but for Harris County name change files
this step must be done)
The CAD Relationship screen in production must
be populated before running this step. This will be a concern only
when loading certified roll files for a new year. Stage 2 loads
the CAD Relationship CAD screen with the accounts in the files loaded
in Stage 1. For information on understanding the information in that screen,
see Maintaining CAD Relationships.
Although that topic pertains to the production screen, the same
data is in the CAD Relationship CAD screen and can be evaluated the same
way.
When loading accounts into the CAD Relationship
CAD screen, the production CAD Relationship table is searched to see if
the ACT CAN has been assigned already. If it is not found, a new account
number is assigned, which is usually the CAN_IN number (which is usually
the prop ID). Remember that these conditions must be researched:
duplicate appraisal district numbers (CAD IN), duplicate ACT CAN
numbers, and missing CAD IN or ACT CAN numbers.
- Return
to the CAD Load/Update screen.
After the staging tables have been loaded via Stage
1, the tab for Stage 2 appears in the CAD Load/Update screen. There will
be a row of data for each software vendor whose files are processed by
the tax office. If you have not loaded the latest set of files from each
vendor, the row for the county or counties yet to be processed will have
a gray background (see below); you will not be able to run Stage 2 for
that county until Stage 1 has been completed successfully.

- The
same procedures are followed for each stage, although the parameter
screen for Stages 2-8 is the same for all counties and vendors. Click
the OK to Run box for the
Load CAD Relationship CAD process
for the desired county.
- All
of the parameters are auto-populated by the wizard.
- Click
Submit Job, then click OK on the "OK
to Submit Job" pop-up screen. You will be returned to
the Stage 2 screen, where the Batch Sequence number (the batch request
seq. no.) and Job Name/Parameter Values fields will be filled in.
- The
Status field contains a P (processing).
- To see
if the load process has finished, you can press F8
on the Stage 2 screen. Alternatively, you can click View
Reports to go to the Batch Request screen. The process is complete
when the Process End Time
is filled in and the Status
changes from P to C
(completed).
A .csv file is sent to the FTP server.
- Review the CAD Relationship
CAD table; make necessary changes
- To
see the CAD
Relationship CAD screen, click the CAD
Sequence number on the Stage 2 screen.
- To
see a list of accounts that were not
in the production CAD Relationship screen, click View
Reports on the Stage 2 screen. At the end of the report
are counts of the accounts that were not in the CAD Relationship screen
and the accounts that were loaded into CAD Relationship CAD screen
(which includes those not found in the production screen).
- On
the CAD Relationship CAD screen, you can search by CAD Sequence No.
- Changes
can be made to the ACT CAN, County code, and Parent number. The parent
account number should be filled in for split accounts and for properties
that cross county lines.
3. Stage
3 - Update Staging Tables from
the CAD Relationship CAD Table (non-Name Change files, but for Harris
County name change files this step must be done)
- Return to the CAD
Load/Update screen.
- For the appropriate county
code, click the Stage 3 tab - From
CAD Relationship CAD. This process updates the ACT CAN
field in the staging tables with any changes you made in the CAD Relationship
CAD table.
- Click the OK
to Run box for the Update Staging
Tables from CAD Relationship CAD process for the desired county.
- Most of the parameters are
auto-populated by the wizard.
- Enter the Vendor
Code (for ex., TA - True Automation, TSG - Software Group,
SWD - SouthWest Data).
- To get a detailed report of
errors, enter Y in the Print Details field.
- Click Submit
Job, then click OK
on the "OK to Submit Job"
pop-up screen. You will be returned to the Stage 3 screen, where the
Batch Sequence number (the batch request seq. no.) and Job Name/Parameter
Values fields will be filled in.
- The
Status field contains a P (processing).
- To learn if the load process
has finished, you can press F8
on the Stage 3 screen. Alternatively, you can click View
Reports to go to the Batch Request screen. The process is complete
when the Process End Time
is filled in and the Status
changes from P to C
(completed).
- Click View
Reports on the Stage 3 screen. The log gives the number
of accounts updated.
4. Stage 4 - Copy
Data from the Staging Tables to the CAD Tables (all non-name change files
plus Harris County name change files)
- Return
to the CAD Load/Update screen.
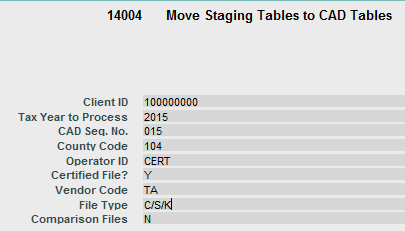
- Click
the Stage 4 tab - Move Staging Tables
to CAD Tables. This process inserts data into all the CAD tables
except the receivable and frozen amount. These will be populated
in later stages. The ACT CAN from the CAD Relationship screen is put
into the account number field. If accounts in the staging tables
are in the production archive tables, the receivables for those accounts
are 'un-archived' during stage 4 in order to prevent duplicate receivables
from being created.
- Click
the OK to Run box for the
Move Staging Tables to CAD Tables
process for the desired county.
- Most
of the parameters are auto-populated by the wizard.
- Enter the Operator
ID.
- In the Certified
File field, enter N
if this is a supplement, correction, or name change file. Enter Y if it is a certified file.
- The File
Type field should be C/S/K
for certified, supplement, and correction files, NC
for name changes, or R for reappraisal. This is auto-populated.
- Change Comparison Files to Y if you are processing a 2023 or later file containing $40,000 homestead exemption amounts for ISDs.
- Click
Submit Job, then click OK on the "OK
to Submit Job" pop-up screen. You will be returned to
the Stage 4 screen, where the Batch Sequence number (the batch request
seq. no.) and Job Name/Parameter Values fields will be filled in.
- The
Status field contains a P (processing).
- To learn if the load process
has finished, you can press F8
on the Stage 4 screen. Alternatively, you can click View
Reports to go to the Batch Request screen. The process is complete
when the Process End Time
is filled in and the Status
changes from P to C
(completed).
- Click View
Reports on the Stage 4 screen.
- The [vendor]-load_utilities_cad
report gives the number of accounts and exemptions inserted into the
CAD tables.
- The ta_agent_report (if True
Automation is used) gives the accounts that were not processed, the
number of agents in the file, along with the agent's name on the file
and the corresponding name in ACT 7. The report also gives the number
for fiduciary requests and, for each account, the fiduciary number
(Agent ID), and an indication about whether the request will be inserted
as a new one.
- For True Automation name change
files, a report of accounts that could not be inserted into the CAD
Relationship CAD table is provided.
- For single entity tax offices, True Automation file processes will load every unit on the file into the staging tables, but not into the CAD tables.
- For True Automation files, a deferral change report is provided that shows start and end dates for each deferral that is modified, added, or deleted.
- A report is created if IRE exemption data is changed on any accounts. This includes changes of Calculation Type from S (system) to U (user) or vice versa.
- Review the data in the CAD Inquiry screens. To do so,
return to the Main Menu, select
Inquiry, then CAD
Inquiry.
- You can search in this screen
by CAD Seq. No., individual
Account Number (this is the
ACT CAN), or Year.
- Make changes as needed in this
screen. You can change anything except the levies and values in the
Receivable CAD screen.
- The Owner ID is moved for both
certified and supplement files to the owner_cad and frozen_amount_cad
tables.
- For the Dallas County Tax Office, apport_cad and receivable_cad records will be created for each PID unit and account. This assumes that batch menu no. 1675, Load PID Data from Saved Portfolios, was run before stage 1 was started.
-
SIT accounts can now be flagged as such during the Dallas County appraisal district file loads. The Tax Unit Maintenance screen for SIT units must have the SIT Only flag checked.
If the account is an SIT account, for an SIT unit, apport and receivables are created in the CAD tables. If the account is not an SIT account but has an SIT unit, the apport will be created in the CAD tables with 0.00 values and no receivable is created.
If both the SIT Only and Compute Taxes boxes are unchecked, then the apport (jurisdiction screen of Account Master) is created with 0.00 values and no receivables are created.
If the Compute Taxes flag is also checked on the unit, the receivable record will be overwritten with the receivable_cad information for the same unit. If the Compute Taxes flag is not checked, the receivable_cad and apport_cad data are not copied over to the real tables.
- For Software Group files loaded
at Harris County, the fiduciary number is put into the owner detail
record and converted to a 9-digit number.
- For Software Group files, the
Roll ID is populated in the apport and owner CAD and apport and owner
real tables. Also, if an M or 0 is given in the Veteran exemption
field on the file, that indicator is removed and the 100% VTX Exempt box
is checked on the Account Detail screen
- SIT accounts loaded with Software
Group (TSG) files should have a Q in the roll code field in the TaxDtl_CAD
tab. (2008 and prior only) For 2009 and forward, SIT accounts for
all tax offices are identified by a check in the SIT Accounts field.
- For Software Group files, the
Days Exempt field in the Owner_CAD tab does not include the number
entered in the Days Exempt Num Days To Adjust field in the Tax Unit
Maintenance screen.
- For Software Group file loads, if the overage_exemption on the file is set to X and the Vet code is 1, 2, 3, or 4, then the VET exemption in the CAD tables is set to $12,000, which is equivalent to code 4. If the Vet code is 7 and an overage_exemption exists, then the exemption is set to the closest actual vet value (for ex., the file may have a $7000 exemption, which will be changed to $7500. The 7 is changed to a 2 in this case).
- Bill suppress codes are not
rolled forward for Harris County Appraisal District files.
- Surviving spouse veteran exemption amounts are shown separately from 'regular' veteran amounts on the Owner_CAD screen but if an account has both surviving spouse and regular veteran exemptions, they are summed together in the VET exemption on the SpecExem_CAD screen.
- The VTX Status feld will have an X for normal VTX exemptions or an S for surviving spouse VTX exemption.
- Scan line numbers for OCR lines
are created from rules supplied by each tax office. For Nueces County
and El Paso, the scan line numbers entered in the Account Detail screen
when the certified load was processed will be used instead of creating
new ones.
- For True Automation file loads,
if the confidential name field in the file is null but the confidential
flag is set to T, we need to put 'UNKNOWN' as the owner in the CAD
tables. For bad address accounts, 'UNKNOWN' is also inserted as the owner name.
- For True Automation file loads,
timber market and timber use values are loaded into timber fields
instead of the ag fields.
For DRH exemptions that have a $0.00 in the file, ACT creates
a $0.00 exemption.
- For True Automation file loads,
the situs suffix (for ex., 'ST') and the situs unit (for ex., '40')
are added to the end of the parcel street address. The situs unit
indicates the unit number in a mobile home park.
- For True Automation file loads, the earliest deferral date will be used for veteran accounts that have multiple deferral dates in the file.
- For Software Group and True Automation files, notes will be inserted for each account affected by the supplement. The tax year, revision code, CAD sequence number, and reason for the changes is given in each note. These notes will be inserted into the production tables in stage 8.
- For Upshur County's Southwest Data file loads, the homestead percentage provided in the file is now being used to calculate the actual HOM exemption.
- For Harris County Appraisal
District prior year files, if an account has both SPL (special valuation)
or NOM (nominal) exemptions and either an OSP (agriculture) or TIM
(timber) exemption, the OSP or TIM exemption is removed. This should
occur in both the CAD tables and in the move to production.
- For Harris County Appraisal
District files, the existing owner effective date should remain if
the accounts have an owner_exist_flag set to 'Y' or 'E'. If it is
anything else, a new owner effective date should be created.
Also, if the same exemption exists for multiple years on an account, the qualifying year is set to the oldest year.
- For accounts in Harris County
Appraisal District files, that have a property code of E1, the ag
values on the files will be loaded. If the homestead percentage is
greater than 0, values will be put into the homesite fields, according
to the amount of the percentage.
- SIT accounts can now be flagged as such during the Dallas County appraisal district file loads. The Tax Unit Maintenance screen for SIT units must have the SIT Only flag checked. If the account is an SIT account, for an SIT unit, apport and receivables are created in the CAD tables. If the account is not an SIT account but has an SIT unit, the apport will be created in the CAD tables with 0.00 values adn no receivable is created. If the Compute Taxes flag is also checked on the unit, the receivable record will be overwritten with the receivable_cad information for the same unit. If the Compute Taxes flag is not checked, the receivable_cad data is not copied over to the real tables.
- (Pritchard & Abbot mineral account files) The Roll Code in the CAD tables and in the Account Detail and Receivable screens is now determined by the following mapping, using the first letter of the state category code on the files. If the first letter is A, B, C, D, E, F, G, J, N, O, or X, the roll code is R. If the first letter is H, L, M or S, the roll code is P.
- Accounts that are marked as non-compliant TIF accounts in the current year, or prior year if no TIF data exists for the current year, will have TIF base and taxable values loaded, but no TIF taxable or TIF levy will be calculated. Current year TIF accounts that have no prior year TIF values, when processed in the CAD wizard , will have the values for base taxable and current taxables set to the same amount. TIF taxable and TIF levy will be $0.00.
- If you have the CAD_ONLINE_UPDATE entitlement, you can click the View Arch Data button to see data from these same tables that have been archived. You cannot make changes to any archive data but you can make changes to any unarchived data (you may need to exit the screen and then return before updating). The Account In field tells you whether the data on the screen is in the archive or 'real' (unarchived) tables.
If you do have the ACT_CADLOADS entitlement but not the CAD_ONLINE_UPDATE' entitlement, you will be able to view all data, but 'real' and archived, but you cannot make changes to any of it. The View Arch Data button will not be visible.
5. Stage 5 - To
CAD Ceilings
- Return
to the CAD Load/Update screen.
- Click
the Stage 5 tab - To CAD Ceilings.
This process either inserts frozen amounts from the appraisal district
files or calculates the freezes. The Jurisdiction CAD Relationship
screen is checked to see if ACT should calculate the freeze. See
Frozen Levy Overview for a
comprehensive discussion of client preferences and calculations related
to frozen levies. The CALCULATE_LEVY_YEAR
is considered during this stage.
- Click
the OK to Run box for the
Update Ceilings process for the
desired county.
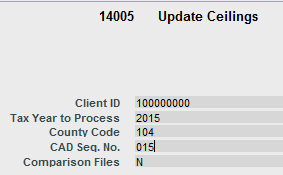
- All
of the parameters are auto-populated by the wizard.
- Click
Submit Job, then click OK on the "OK
to Submit Job" pop-up screen. You will be returned to
the Stage 6 screen, where the Batch Sequence number (the batch request
seq. no.) and Job Name/Parameter Values fields will be filled in.
- The Status
field contains a P (processing).
- To learn if the load process
has finished, you can press F8
on the Stage 5 screen. Alternatively, you can click View
Reports to go to the Batch Request screen. The process is complete
when the Process End Time
is filled in and the Status
changes from P to C
(completed).
- Click View
Reports on the Stage 5 screen. The log file gives the number
of frozen records inserted into the CAD tables and the number of ceilings
to be inserted for each jurisdiction.
- Other reports that should
be generated are:
- Make any changes necessary
to the freeze information in the CAD
Inquiry screen.
- For freezes affected from 2019 forward by the 2023 SB2 legislative change, freezes for school districts will be compressed. The compression rate is calculated as the Maximum Compressed Rate (MCR) from the selected year subtracted from the M&O rate in the prior year. See
Frozen Levy Overview for more information.
- For 2015 school district accounts having a HOM exemption, freezes will be compressed by multiplying 10,000 (the difference between homestead exemptions of $25,000 and $15,000) times the tax rate/100, then subtracting that value from the 2014 frozen levy amount. For new 2015 freezes, ACT assumes that the frozen levy amount is correct.
- The freeze year, tax unit granting
the freeze and port percentage are loaded directly from the file.
Depending on the setting of the Ceiling Control option in the
Jurisdiction CAD Relation tab (in the Tax Unit Maintenance screens).the
freeze amount is either loaded from the file or it is calculated.
This setting is either CAD (to load the amount from the file)
or ACT (for ACT to calculate )
- If you need to add ported freeze
information, enter the port percentage, year, and freeze amount (there
is no button to calculate the port freeze amount) if the vendor does
not provide this. For Software Group files, the port percentage must
be calculated based on data in the file, so make sure that in the
Jurisdiction CAD Relation tab in the Tax Unit Maintenance screens,
the Ceiling Control option is set to ACT.
- Your operator ID and the change
date for these changes will be preserved when the data is moved to
the production tables.
Note: If you make
changes in the CAD Inquiry screens after you ran stage 6 - Generate Receivables,
you will need to clean up that step and run stage 6 again.
Note:
If you are processing files for real property prior years, you must leave
the wizard at this point and run the freeze compression processes, batch
menu nos. 1918, 1920, or 1921. After completing that, return to the wizard
and begin with stage 6.
6. Stage 6 - To
Receivables
- Return
to the CAD Load/Update screen.
- Click
the Stage 6 tab - to Receivables.
This process creates receivables and calculates the levy for each
jurisdiction and account. It does not re-calculate frozen levies,
but inserts the amounts from the Frozen Amount CAD screen into the
Receivable levy field (unless there is also ag or non-qualifying levy
to add to the frozen amount). Attorney penalty dates (33.11,
33.07) are inserted at this time if the client preferences CERT_PRESET_3311
and CERT_PRESET_3307 are set
to Y and certified files are being processed. The Revision Code is
also set during this process. The Fiscal Period Levy is set if certified
files are being processed. The CALCULATE_LEVY_YEAR
is considered during this stage.
- Click
the OK to Run box for the
Update Receivables process for the
desired county.
- All
but one of these parameters are auto-populated by the wizard.
- In the All
Tax Units Provided field, leave Y
unless you are processing Harris County Appraisal District files,
which provide only the change units, not all units.
- In the Certified
File field, enter Y
or N as needed
- Click
Submit Job, then click OK on the "OK
to Submit Job" pop-up screen. You will be returned to
the Stage 6 screen, where the Batch Sequence number (the batch request
seq. no.) and Job Name/Parameter Values fields will be filled in.
- The Status
field contains a P (processing).
- To learn if the load process
has finished, you can press F8
on the Stage 6 screen. Alternatively, you can click View
Reports to go to the Batch Request screen. The process is complete
when the Process End Time
is filled in and the Status
changes from P to C
(completed).
- Four reports are created: a
log file that lists the number of records read and the number of records
that could not be read, plus a list of these accounts whose taxable
value (for TL receivables only) in the CAD tables does not match the
ACT-calculated value; a progress file that prints out a line for every
15,000 accounts and lists the total number of accounts processed;
an error file that lists the error message and for each account; and an Expected Refunds report. This shows refunds to be generated if payment exists on the account and the new levy in the CAD tables is less than the paid amount. The refund amount will be the difference between the paid amount and the new levy.
- If the receivable roll code
is P and the delinquency date is before 4/1/tax year + 1 and the tax
unit collects 33.11 fees, then a 33.11 date is set (in the 33.07 column).
If the unit does not collect 33.11 fees, then a 33.07 date of 7/1/yyyyy
+ 1 is set. If the delinquency date is after 4/1 but before
6/1, then a 33.07 is set. If the receivable roll code is not P and
the delinquency date is before 6/1, then a 33.07 is set. For
all other cases, no 33.07 date is set. These changes are visible in
the CAD tables.
- (Dallas County) Penalty amounts are added to fiscal period levy. The Dallas County audit report lists a summary of data by jurisdiction, accounts where the taxable value differ between ACT and the file, inactive accounts with no CAD receivable record, and CAD receivable records not created by the supplement process but whose accounts were on the file(s).
7. Stage 7 - Audit
- Return
to the CAD Load/Update screen.
- Click
the Stage 7 tab - To Receivables.
This process creates the CAD Tables Jurisdiction Summary Report &
File (TC501C), which provides value and exemption information by unit.
This must balance to the totals provided by the appraisal district.
- Click
the OK to Run box for the
CAD Tables Jurisdiction Summary Report
& File (TC501C) process for the desired county.
- All
but one of these parameters are auto-populated by the wizard. In the
Tax Year field, enter the
year of the data in the file.
- Click
Submit Job, then click OK on the "OK
to Submit Job" pop-up screen. You will be returned to
the Stage 7 screen, where the Batch Sequence number (the batch request
seq. no.) and Job Name/Parameter Values fields will be filled in.
- The Status
field contains a P (processing).
- To learn if the load process
has finished, you can press F8
on the Stage 7 screen. Alternatively, you can click View
Reports to go to the Batch Request screen. The process is complete
when the Process End Time
is filled in and the Status
changes from P to C
(completed).
- The
values on the TC501C must match those provided by the appraisal district.
If they don't, stop, and do not apply this request sequence to production. Technical notes: the TC501 considers the apport and taxdtl records, not the receivables records, and excludes accounts with an Account Status that begins with 'X'. Rendition penalty units that have apport records are included. Rec type codes (for ex., OS) are not considered.
-
For Software Group and True Automation files, appraisal district
totals are loaded into the tsg_cad_totals and ta_cad_totals
tables, respectively, if a totals file name is given in stage 1.
- Rendition penalty changes should
appear in the CAD tables.
- If the client preference TC501_ALLOW_MULTI_EXEMPTIONS is set to Y, the Homestead Amounts for state and local homesteads will include both PAH and HOM exemptions and the Disabled Amount will include both DRH and PRH amounts. If the preference is set to N (the default), the last exemption of each pair is considered.
- Other reports that should
be generated are:
- Supplement/Correction Pre-Process
report, batch menu 752. This displays the accounts and supplement
type on the file.
- Appraisal
Edit report, batch menu no. 753. This lists the before
and after amounts for each account, by unit.
7.5. Stage 7.5 - Compare (for 2015 SB1 accounts; use only for $25,000 HOM files)
- Return
to the CAD Load/Update screen.
- Click
the Stage 7.5 tab - Compare.
This process populates the Event Comparison CAD screen with data based on $40,000 HOM exemptions on school district accounts.
Frozen levy amounts are calculated only if not provided by the CAD. T
- Click
the OK to Run box for the
Update Receivables process for the
desired county.
- All of the fields are auto-populated except the CAD Seq. for 40K HOM File. Leave this blank if you receive only one file or set of files) from the appraisal district that contains $40,000 HOM exemptions for school district accounts.
- Click
Submit Job, then click OK on the "OK
to Submit Job" pop-up screen. You will be returned to
the Stage 7.5 screen, where the Batch Sequence number (the batch request
seq. no.) and Job Name/Parameter Values fields will be filled in.
- The Status
field contains a P (processing).
- To learn if the load process
has finished, you can press F8
on the Stage 8 screen. Alternatively, you can click View
Reports to go to the Batch Request screen. The process is complete
when the Process End Time
is filled in and the Status
changes from P to C
(completed).
- The log report gives the total rows inserted.
8. Stage 8 - To
Production
- Return
to the CAD Load/Update screen.
- Click
the Stage 8 tab - To Production.
This process moves the data from the CAD tables to the production
(real) tables.
- Click
the OK to Run box for the
Apply CAD Tables to Production process
for the desired county.

- Most
of these parameters are auto-populated by the wizard. You can enter
or change the following:
- Update
Label: Enter the label of your choice
- Note
Text: Enter the text to be inserted for each account
- Process
Option: Enter E for
edit or U for update (to move
the data to production)
- Certified
Load: Enter Y if this
is a certified load; otherwise, leave the default of N.
- County
Code: If you have merged files from two or more counties together
(which sometimes occurs with certified files), leave this blank.
- Deposit
Date: Leave blank to use the current date for any 'RF' refund
deposit that must be created. To use a different date, enter it in
this field. This is useful, for ex., if you want to put the deposit
on a weekend.
- New
Delinquency Date: Leave the New Delinquency Date field blank
to use normal due dates of the first of the next month at least 21
days in the future. Enter a different date if the first of the month
falls on a weekend or holiday, when the tax office is closed. (Penalty
and interest will not be charged until the due date, so you will not
need to back date receipt dates to accommodate for the weekend.)
If a date is entered, due dates are changed only if the current due dates on an account are prior to the date in the parameter. However, if there is a receivable in the CAD tables but not one in the real tables (for ex., on an omitted property account), and the due date in the CAD table is later than the date entered on the parameter screen, then the due date in the CAD tables is used. The actual due date put on each account is the latest of the receivable data in the CAD tables, the receivable data in the real tables, or the date in this New Delinquency Date parameter.
- New
Date Levy Increase Only: If you entered a New Delinquency Date
(see above), then you can enter Y
in the New Date Levy Increase Only field to force the due date to
be changed only on fully paid accounts that had a levy increase as
a result of the supplement/correction process. If you enter N in the New Date Levy Increase
Only field or leave this field blank, all accounts in the file will
have their due dates changed
- Due
Date for Name Changes: If you want the delinquency date to
change for accounts on name change files, enter the desired date in
this field. The date will change only for accounts on the file that
actually had changes made to the Owner Detail.(Software Group, True
Automation, SouthWest Data files only)
- C/S/K Received Date: Defaults to current date. Change if desired to the date you want for the Last Certified Date for these accounts in the Account Detail tab of Account Master.
- Mail Date (Defer End Date): Enter the date to be inserted as the Defer End Date in the Account Master. This should be the expected mailing date for delinquency notices for deferral accounts. It defaults to the 10th of the month following the date BMI 14008 is run. The CAD Defer End Date is populated with the deferral end date in the file. If the CAD file has no deferral end date for an account that previously had such a date, the CAD Defer End Date and the Defer End Date will be removed; the deferral has been reopened. Also, if the CAD Defer Date has not changed, the Defer End Date will not be updated either.
- Deferral dates on a certified file: If the deferral start and end dates on a certified file for a new tax year match what is in the current year record, these dates remain the same for the new year, and the Mail Date from the parameter in stage 8 is ignored. If the deferral start and end dates on a certified file for a new tax year do not match the dates for the current tax year, the Defer Start Date and the CAD Defer End Date for the new year will reflect the dates in the file while the Mail Date entered in stage 8 will be the Defer End Date. If the deferral start date on the certified file matches the current year record, but the deferral end date on the file does not match the current year CAD Defer End Date, the Defer Start Date and CAD Defer End Date remain the same for the new year as on the file, but the Mail Date will be the date entered in stage 8.
- Click Submit
Job, then click OK
on the "OK to Submit Job"
pop-up screen. You will be returned to the Stage 8 screen, where the
Batch Sequence number (the batch request seq. no.) and Job Name/Parameter
Values fields will be filled in.
- The Status
field contains a P (processing).
- To learn if the load process
has finished, you can press F8
on the Stage 8 screen. Alternatively, you can click View
Reports to go to the Batch Request screen. The process is complete
when the Process End Time
is filled in and the Status
changes from P to C
(completed).
- The log report gives the number
of accounts inserted or updated in each database table. The county
code is inserted or updated on the Account Detail screen, the CAD
Relation table is updated with the data in the CAD Relationship CAD
table, and the Revision Code and Operator in the Receivable screen
should be updated. Mobile home accounts will be reported as
errors if the account number is invalid (perhaps because the parent
record does not exist for the current year). Accounts with less than 100% ownership or allocation are listed separately.
- For Software Group and True Automation files, notes will be inserted for each account affected by the supplement. The tax year, revision code, CAD sequence number, and reason for the changes is given in each note. These notes are copied from those created in stage 4.
- For Harris County appraisal district files, a report listing qualifying freeze accounts that have multiple pro-rated homestead exemptions (IRE) is generated.
- If the client preference ENFORCE_ACCOUNTING _CONTROLS is
set to Y and the accounting
control deposit has not been opened for the day being processed, the
process will stop and a deposit error message will be displayed on
the process log file. This will happen when trying to open an RF deposit
for refunds.
- If accounts for the new year
already exist in the real tables when the new certified load is moved
to production, only the account detail (taxdtl), property values and
other indicators on the Property Value screen (the valdtl table),
and the owner master will be updated.
- The scanline number is populated
if it is available in the CAD tables.
- If an account has no property
value, special exemptions or frozen levy, the opercode on those tabs
will be NEW_RECORD and the change date will be the current date. If
changes are made to the information on any of these screens, then
the opercode and change date will also change.
- For
Harris County Appraisal District files, an 'S' is put in the Disabled
field on the Account Master screen for SRG (surviving disabled spouse)
exemptions.
- For
Harris County Appraisal District, True Automation and SouthWest Data
supplement/correction files, mobile home information in the production
tables will be deleted for accounts in supplement/correction files
if they are not marked as mobile homes in the mobile home CAD tables.
For Software Group, Dallas County Appraisal District, and Jefferson
County Appraisal District files, this information is not deleted,
although mobile homes can be added via these files.
- For prior year supplements or name changes on accounts where the years after the year of supplement are inactive, we will now update names on those subsequent years. For ex., if the file is for 2009 and one of the accounts on the file is inactive in 2010, then any name change on the 2009 file will also be made on 2010.
-
For new fiduciaries inserted during supplement and certified processing, the Tax Statement check boxes on the Fiduciary master screen will be checked by default.
-
If, on the Tax Unit Maintenance screen, the Unit Type is NOCALC or the Compute Taxes box is not checked, these units will not be updated during the supplement process.
- Complete steps 8.1
- 8.10 from the table at the
top of this topic to make sure the accounts are still in balance and
to print statements, either in-house or at a printing vendor.
- Consider checking the Closed button on the Stage 1 screen
to prevent further changes to these accounts.
Clean Ups
At any time during the loading and processing of appraisal district
files, you can 'clean up' stages that you want to redo. Doing a 'clean
up' means that the data will be deleted from the staging or CAD tables
for that stage. You can begin the clean up at any stage, but all subsequent
stages for that Control ID and CAD Seq. No. must also be cleaned up. Do
not run more than one clean up job at once; doing more may lock the database
tables.
Do not clean up every time you
see a problem; sometimes it is best to start over with stage 1 and a new
Control ID.
To do a cleanup,
- Click the OK
to Run checkbox (on the left of the wizard screen) for any
stage that has a Status of
C (completed). This stage
must be The earliest stage
that needs to be cleaned up.
- A message appears:

- Click Yes
to continue. A screen similar to the following appears. The specific
batch menu number differs depending on which stage you are cleaning
up.
- All of the fields are auto-populated.
Click Submit Job, then click
OK on the "OK
to Submit Job" pop-up screen.
- You will be returned to the
same stage of the wizard. The row corresponding to the data being
cleaned up is highlighted in yellow and the Status
will be P. Press F8 to see
if the job has finished.

- After the clean up is complete,
click the OK to Run checkbox
twice. The first time removes the yellow highlighting and changes
the Status to X;
the second times brings you to the parameter screen:

Note: When processing
name change files, the cleanup process for stage 1 deletes the owner_cad
records in addition to the staging tables.